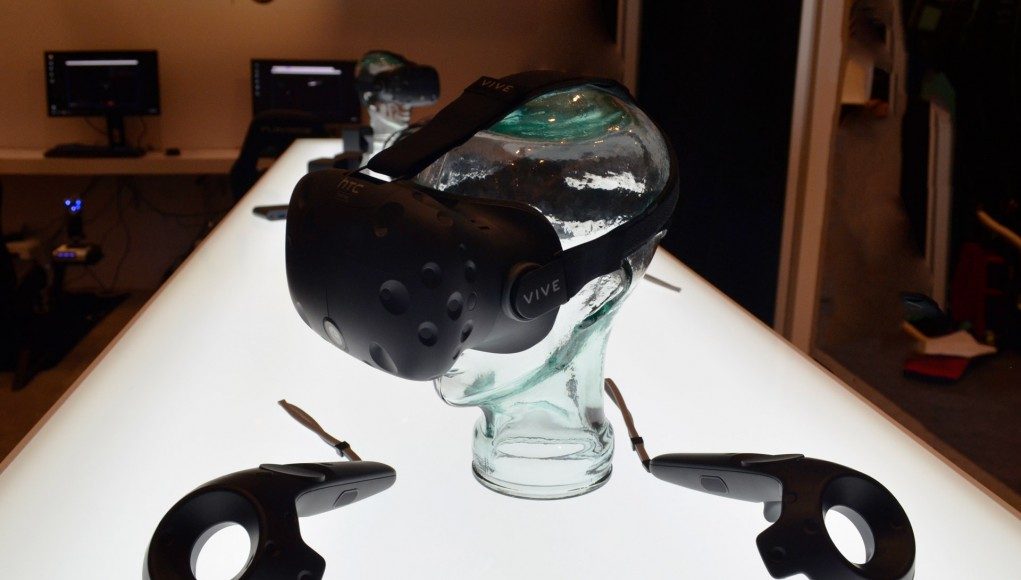
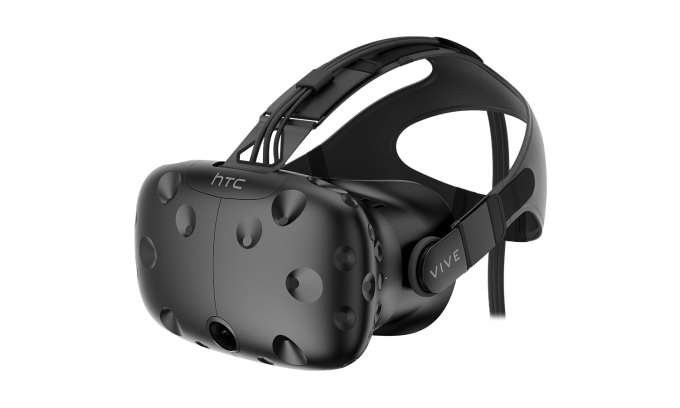
We go hands on with Valve and HTC’s new room-scale virtual reality system the Vive and discover that with incredible VR experiences come great real estate requirements.
We’ve been reporting on virtual reality since 2011 here at Road to VR, and it’s somewhat surreal to have documented the stumbles, triumphs and staggering achievements of pioneers in this space, to suddenly publishing reviews for two new consumer VR products (our Oculus Rift review here) within eight days of each other. After all that time, virtual reality’s arrival for the home kind of snuck up on us.
The Oculus Rift VR headset, the Kickstarted initiator of this new-wave VR industry, was launched on March 28th and represented a technological milestone in consumer electronics. The Rift is slick in design, lightweight and easy to use. It is a great VR headset—one that we’ve watched evolve since 2012—and it provides an excellent but resolutely seated VR experience as it stands (though that may change when the company launches their Touch motion controllers later this year).
The Valve developed, HTC manufactured Vive by comparison appeared relatively recently, being announced by surprise at Mobile World Congress in Barcelona just last year. It went on to storm GDC 2015 shortly afterwards, announcing that room-scale VR had arrived and that its laser-powered Lighthouse tracking offered the solution. In the 12 months since, the word about Valve’s entry into the VR space has spread and the hype surrounding the HTC Vive’s launch has grown. I’ve been living with the realitie of room-scale VR for a few days now, here are my thoughts.
Table of Contents
- Conclusion: Room-scale VR is Incredible, but is it Practical?
- Hardware
- User Experience & Setup
- Specs & Performance
Conclusion: Room-scale VR is Incredible, but is it Practical?
I realise this goes against convention, but with this review spanning nearly 8000 words, I thought it best to present a summary upfront for convenience.
I’ve spent a few days at home with the HTC Vive and SteamVR and yet, I’ve experienced moments in the virtual worlds the system is capable of creating the likes of which I’ve never seen before. There’s something intangibly special about moving around VR with your whole body in tow. Engaging your physical self in virtual worlds seems to unlock new opportunities for achieving presence that felt out of reach with seated experiences.
Titles like Valve’s The Lab and Owlchemy’s Job Simulator demonstrate a joyfulness and accessibility in motion that few developers have managed to capture but the good news is, this playfulness baton seems to have been picked up by other developers inspired by the freedom of experience SteamVR can allow.
The hardware itself, despite not being pretty, is expertly designed and robustly built. Features like IPD adjustment for example, work intuitively thanks to the chunky design ethos that runs through the Vive hardware design. The headset is light enough to be worn for long periods and comfortable enough for you not to want to rip it from your face after 10 minutes. Glasses wearers are well catered for too and even different face shape profiles are taken care of thanks to the included and easily interchangeable face interface cushions.
The visual experience is also excellent, with an FOV that, although still suffering from the binocular vision effect found on most headsets, manages nevertheless to provide a wide open view vertically and horizontally for you to see into the virtual plane. Fresnel artifacts are obvious I’m afraid, and your awareness of glare and those fresnel ridges, will vary from application to application. I’d say however that, given time, these artifacts become an accepted part of the experience and the compromises made here fo benefits elsewhere are well worth it.
The SteamVR interface provides for a digital life within virtual reality. Thanks to the SteamVR controllers’ precision, even with active, usable resolution within the headset lower than that found on most desktop monitors, you can navigate both Steam’s interface as well as your operating system’s desktop mostly with comfort – with some fiddly exceptions. There were a few application wobbles, crashes and hangs in my time using it, but SteamVR is clearly being iterated upon quite rapidly – it updated 3 or 4 time in the few days spent preparing this review.
The software library available on day one, considering the HTC Vive didn’t exist at all for most developers up until 12 months ago, is pretty good. There are still many experiences or games that are either unfinished or present in taster / demo form and, arguably, the lead time that Oculus hold mean their launch titles constitute what could be termed as ‘full games’. Valve tells us however that launch day will see the 40 or so titles I’ve had access to swell further so the situation will improve rapidly.
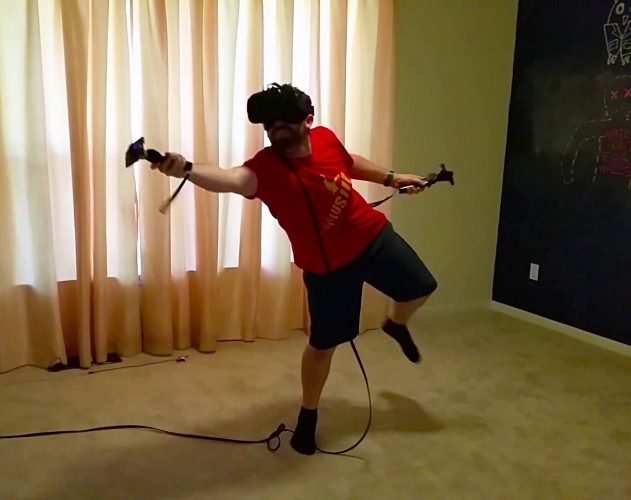
The question of the practicalities of room-scale however hang as a large question mark over all I’ve said above. The HTC Vive is unquestionably capable of a seated (or standing) VR experience, which means it can arguably keep up with the Oculus Rift in those forms of content. But the true differentiating potential is in the room-scale experience, unlocked by Valve’s Lighthouse tracking, and for that you’re going to need to commit a sizeable chunk of your home to it. If you can spare around 3M x 2M somewhere in your home, or better still dedicate a room of that size to it, you’re in for a wild ride. Anything less than that feels like stifling the Vive’s true potential.
One caveat on that front however; I haven’t yet spent enough time in smaller room-scale or standing configurations to form a complete picture on this so I’d suggest if you can, try the system out configured for the playspace you’ll be able to manage and decide for yourself. The Vive has already begun appearing in some bricks and mortar stores, and it won’t be long before opportunities to try it will be more commonplace on high streets everywhere.
In conclusion, the HTC Vive and SteamVR offer an incredible fusion of cutting-edge hardware and software delivering an often mesmerising virtual reality experience the likes of which the consumer has never seen before. Your room-scale mileage may vary, but if you have the space to let the Vive breathe, you’re in for a hell of a ride into the future of immersive entertainment – and you might just lose few pounds getting there.
Unboxing the Vive
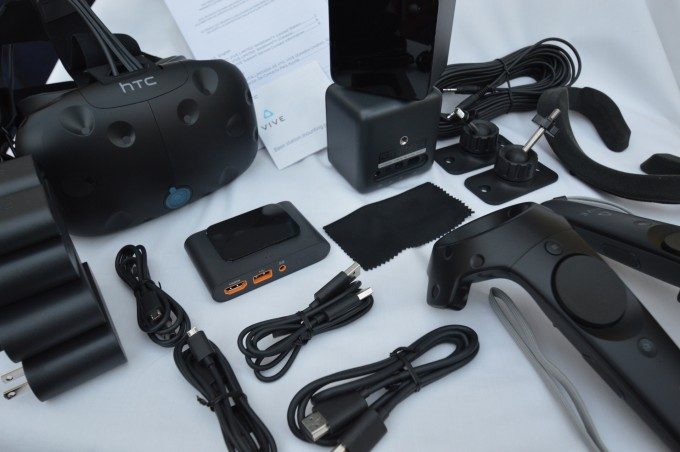
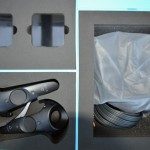
This is the scene you’ll encounter just after you’ve unboxed: the Vive unwrapped and laid out, ready for assembly and set up. It’s a fairly daunting pile of hardware I’m sure you’ll agree. Here’s a full breakdown of what you get in the box (head here for a full collection of our Vive unboxing shots).
- 1 x Vive Headset (with pre-attached but detachable cables: HDMI, 12c Power, USB
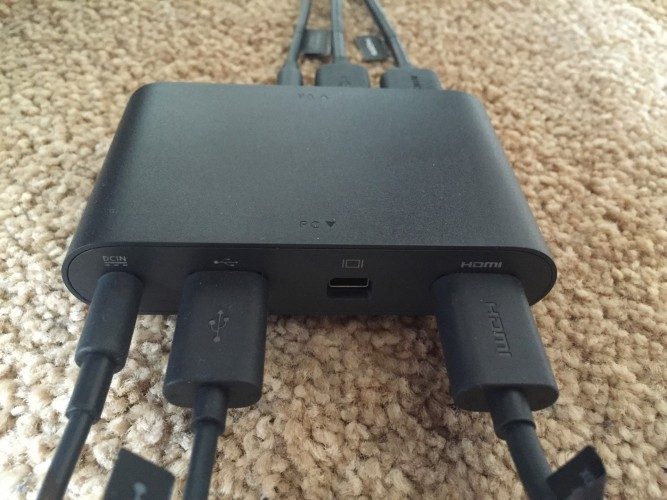
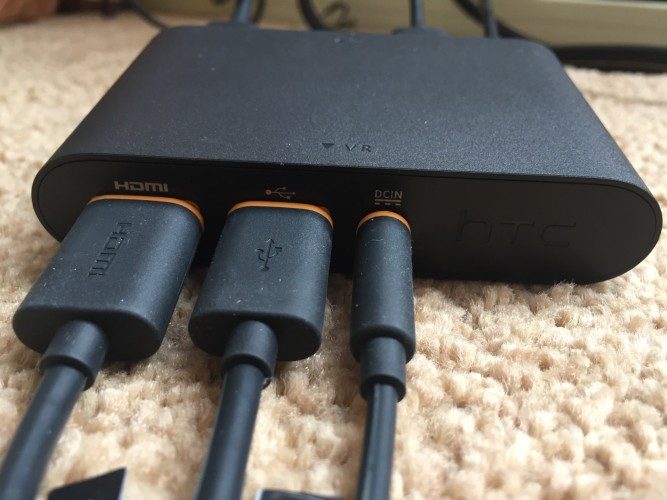
- 1 x Breakout box with inputs for: [12v DC In, Mini Displayport, HDMI and USB] and outputs to Vive headset for [12v DC, USB and HDMI]
- 1 x HDMI cable (Breakout to PC)
- 1 x USB to USB (Breakout to PC)
- 2 x Lighthouse Laser Base Stations
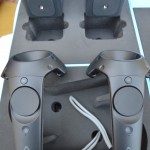
- 2 x Steam VR Wireless Motion Controllers
- 2 x Micro USB to USB Cables (Controller Charging)
- 2 x USB Charging Plugs
- 2 x 12v DC Lighthouse base station power supplies
- 1 x 12v DC for Breakout Box / Headset Power
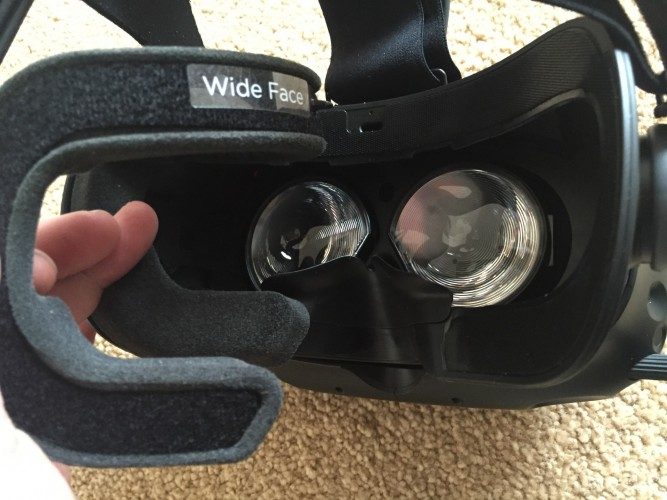
- 1 x ‘Narrow Face’ Headset Interface Cushion
- 1 x (pre-fitted) ‘Wide Face’ Headset Interface Cushion
- 2 x Lighthouse Base station mounting brackets, rawl plugs and screws
- 1 x Quick Start One-sheet
- 1 x Pair of HTC Ear-bud earphones
The Boring but Necessary Setup Bit
Despite the piles of equipment that greets you after unboxing your new HTC Vive, the myriad cables and boxes are actually logical enough to string together. What’s more, you probably already have the software (SteamVR) already installed. Here’s a rundown of the steps I followed.
Step 1
For data, the Vive system requires just a single USB 2.0 port to attach from your PC to the Vive breakout box. For video, a single HDMI or mini-Displayport interconnect with the breakout is required. All cables running from the breakout to PC are grey only, matching the breakout boxes’ colours. Once you’ve sourced a power outlet and hooked up the 12V DC power supply to the box you’re done with the PC connections.
Step 2
Take the cables leading from the Vive headset (marked with orange edging to differentiate) and plug the HDMI, USB, and DC cables into the breakout box. You should find the Vive headset’s power LED light up red. If it has, you’re good to go!
Step 3
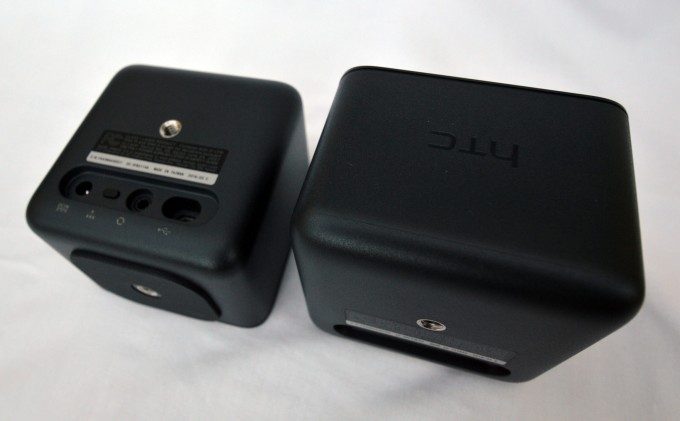
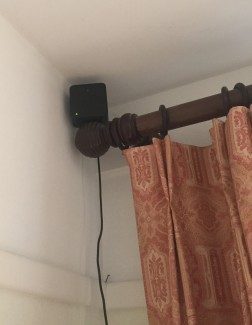 For the included Lighthouse base stations, try to find an elevated position for both (top of bookcase is ideal), but equally positions where they can ‘see’ most of the playspace and each other. Line of sight between the Lighthouse base stations is needed order to wirelessly synchronize them (though there’s an optional sync cable included if they can’t see each other for some reason). Run the power cables, switch them on and once the two stations are powered and can see each other they should light up green. Only issue I had here was a centrally mounted light fitting which seemed to occlude synch between the two base stations, though once position was adjusted on one of the units slightly, all seemed well.
Step 4
 Now for software. The good news is that you’re probably already running the primary software component needed to drive the VR experience behind the HTC Vive. Valve’s SteamVR content platform provides the portal through which you’ll initiate and direct your Vive experiences inside and outside VR. SteamVR is actually an integrated application which drives the setup, configuration, and the user interface portions of the Steam-in-VR experience. If you launch Steam with the Vive attached, it’ll prompt for you to install SteamVR if it’s not already there. Once installed and with the Vive hooked up, you should see a ‘VR’ icon in the top right of the Steam window. Hit this to start SteamVR.
Step 5
Finally, you need to tell SteamVR about your physical play space, or define your room’s scale, if you will. This step felt a little less fluid in comparison to the rest of the above steps.
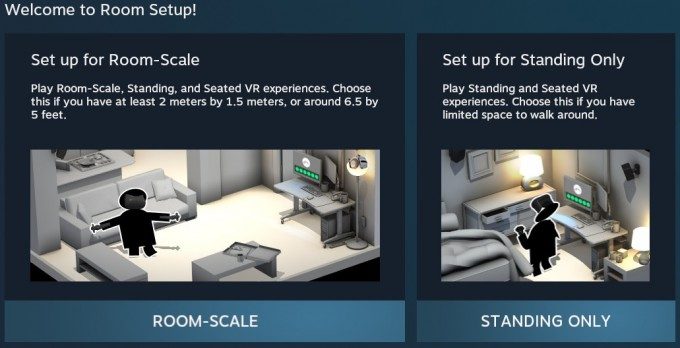
The process itself is well guided, with a clearly illustrated wizard. First you’re asked to choose your tracking profile, ‘Room Scale’ or ‘Standing Only’. Choosing ‘Room-Scale’ initiates the physical room calibration steps. Room-scale in SteamVR is defined as a space over 2 x 1.5 meters (6.5 x 5 feet).
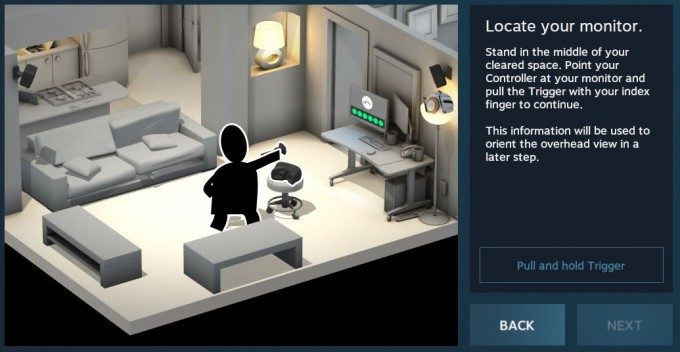
First you’re asked to pick up a controller and point it at your PC’s monitor, then set both controllers on the ground for floor calibration.
Finally, you’re asked to define the borders of your room by tracing its boundaries with one of the SteamVR controllers. Despite Lighthouses’ excellent coverage with just two base stations, by definition this step pushes them to their limits and I had to restart the process several times after losing tracking at various points around the room.
A nice touch here however: the controller generates haptic pulses for each tracking dot drawn on the room-scale boundary map, with a rapid pulse if tracking is lost. It provides great feedback to let you know that you’re sucessfully defining the boundary.
I chose the standard room setup wizard, but you have the option to select ‘Advanced’ and plot individual boundary points, effectively playing ‘join-the-dots’ with your room’s nooks and crannies for a more precise fit.
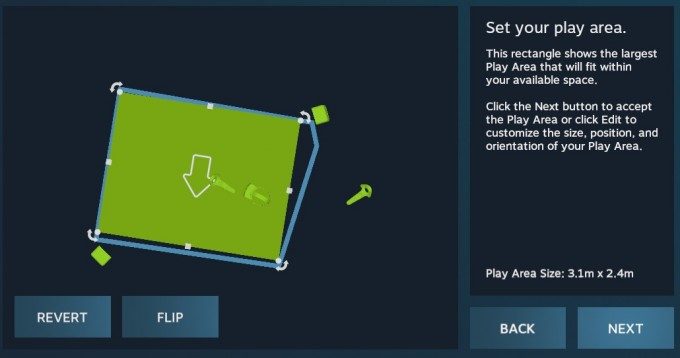
With either method, once complete you’ll be presented with a map which calculates the largest rectangular space that can fit in the area you defined. Now that’s done, all games built on the SteamVR platform will use your room-scale profile to define your virtual boundaries whilst in VR.
An Introduction to Lighthouse Tracking
Arguably the key differentiator for SteamVR as a platform and the HTC Vive as a product is its Lighthouse tracking system. It’s a highly scalable (in theory) laser-based technology that uses base stations placed around your chosen room. Valve Programmer Joe Ludwig described it thus:
“The way this works is: 60 times a second it flashes a globalstrobe of light followed by one of the laser sweeps, and then it flashes again and follows the other laser sweep. Between the flash and a sweep hitting a given sensor—we can time that—with that timing information we then know the angle of that sensor relative to that axis on the base station. So you do that in two axes for each sensor on the device where they’re all rigidly attached together.”
[gfycat data_id=”MeekForsakenBasil” data_autoplay=true data_controls=false]
The base stations themselves are wirelessly synced to eachother but otherwise independent of the rest of the Vive system. That is, they require power to each unit and line of sight to another base station if more than one is in use, but no data is captured by the them and therefore no PC attachment required. They’re like lightbulbs which bath a room in light—the lightbulb doesn’t need to ‘know’ anything about the room to illuminate it—except with Lighthouse, instead of filling the room with light, the units are filling the room with structured lasers which can be detected by the headset and used for tracking.
This means that you can place your Lighthouse base stations in awkward positions, ideally opposing each other in your playspace and as long as you have a power source, you’re good to go. In theory, the system will work with just one base station, but for room-scale setups, two or more units are recommended in order to minimise occlusion (situations where objects block the lasers from reaching the headset or controllers).
Chaperone, Your VR Comfort Blanket
Real life is VR’s biggest inhibitor, and when it intrudes, that fragile sense of Presence (a term used to describe a state of psychological immersion) can be broken. Asking someone to blind themselves to the world by putting on a VR headset is bad enough, but when you then ask them to walk around using only the virtual world as guidance, that’s pushing trust further than we’re used to.
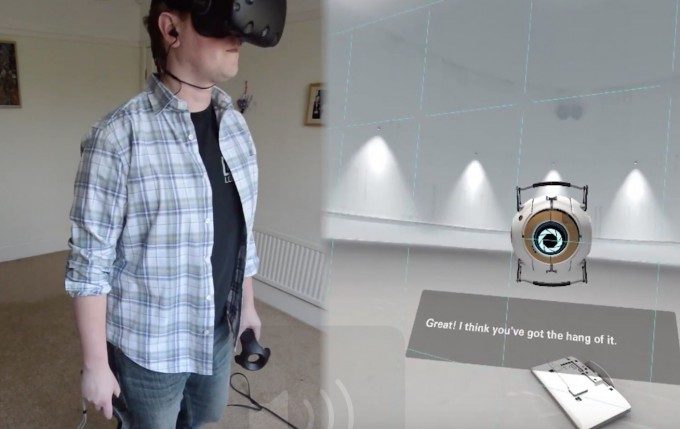
Valve is well aware of this, so in order to bring their vision of free-roaming virtual reality to people’s homes, they needed a virtual comfort blanket; a helping hand that gives players precise feedback on whether they’re about to flatten themselves against a wall, one that could be forgotten about for the majority of the time. The system is called Chaperone and manifests itself as a luminous, transparent grid marking your defined play space boundaries. It’s invisible most of the time, but it will fade into view as soon as your head or hands gets near to it.
It turns out to be a remarkably effective system. After a couple of hours spent in VR using the Vive, you’ll learn to trust Chaperone (almost) completely, and as time goes on it becomes easier to let go of the physical plane with the confidence you’ll receive a timely warning should it threaten to intrude.
The technology is (as yet) unable to map any real world objects at all, be that mounted, hanging, or affixed anywhere in your room for example. It took three controller collisions with my dining room light fitting before I admitted defeat and ended up taking it down. This was mostly to remove the risk of damaging it of course, but part of it was to remove the risk of reality crashing into your virtual world so abruptly; it can be seriously jarring for the mind. When you clash with a real object whilst lost in VR, it takes your brain a handful of microseconds to understand what happened, during which your mind sits in an unpleasant limbo between reality and unreality, like having a pesky loose connection to the Matrix.
The Front Facing Camera
A hardware feature that was long rumoured (you could even see the spot reserved for it on the original Vive developer kits) finally appeared at CES in January along with the unveiling of pre-release Vive hardware, known as the ‘Pre’ appropriately enough.
When we got our hands on the system it quickly transpired that this was yet another feature, designed to aid and assist with the confidence to use room-scale VR. Working hand-in-hand with the Chaperone system, the camera can be set to bring up a wide FOV view of whatever is in front of you should you stray too far towards the chaperone bounds. You can also engage a feature which allows the camera view to be called up with a double-tap of the StemVR controllers’ ‘system’ button.
The system works extremely well, and despite the fact that this is a single camera with no stereoscopy as a result, the approximations you can make as to real-world object position using just the camera is actually quite impressive.
Living with Room-scale
So, here’s the rub. I can wax enthusiastic until the cows come home about how the HTC Vive, powered by SteamVR, offers some of the most dazzling glimpses at VR’s future I’ve ever seen. I could go on about how it holds the ability to deliver a sort of ‘alpha release Holodeck’, and the technology it brings to your home is impressive in its elegance and execution. But none of that matters a jot if you don’t have the space to enjoy it in the first place.
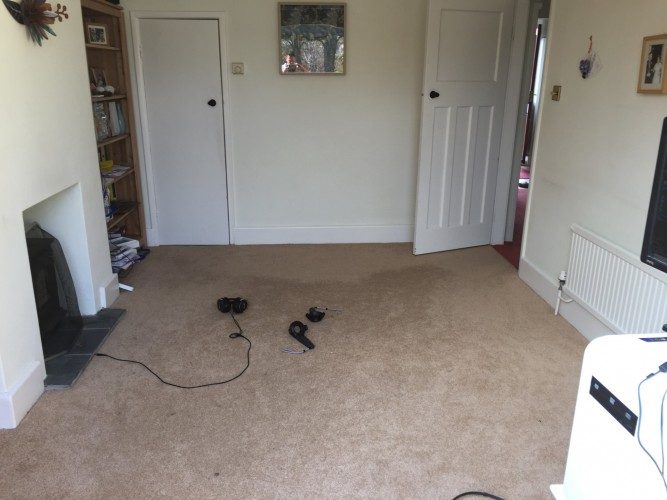
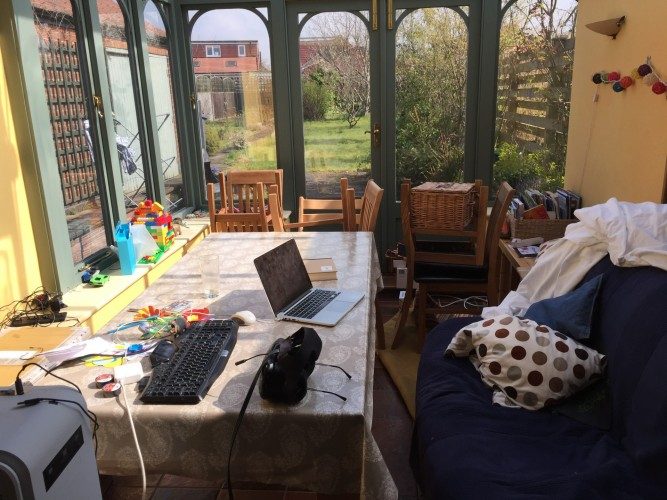
As I went about running cables and positioning equipment, I soon realised that my modest 1930’s, four bedroom house in the UK held only one room that could accommodate the 2 x 1.5M minimum space required for room-scale VR. Naturally, it was our Dining Room.
With power points available in three corners of the room to power my PC and both of the two Lighthouse base stations, and with an adjoining conservatory handily available to act as temporary parking for the dining room table and chairs, set up was a breeze. Once I’d positioned the Lighthouse base stations (one atop a book case and one perched on the end of a sturdy curtain pole), the rest was working my way judiciously through the bunch of cables until all SteamVR components and the PC were up and running.
I was pleased that my room of choice may well have been well formed for the purposes of virtual reality, it also happens to be a regularly used Dining Room. My only option to test room-scale VR was to disassemble my dining room, moving all the furniture into the adjacent conservatory. This was fine as a one-off process, but of course, as soon as we wanted a family meal I’d have to pile all the furniture back in again, a prospect that soon began to seem mighty unappetizing.
Base station positioning for me was trouble free. In truth, I’d been planning exactly where the two units would go for months, and luckily the diminutive size of the Lighthouse base stations meant I simply had to place them in my planned position, handily within reach of a power source for each.
And of course, you need a powerful PC to power everything. Driving 2160 x 1200 at 90FPS isn’t a job for most laptops. So, I needed to move my PC and a monitor into the dining room too, along with all the input gubbins, power cables and interconnects. Luckily our Exemplar Ultimate PC is reasonably compact and easy to shift around.
So, the question is: how far are you willing to go to enjoy top of the line room-scale VR? My house is probably an example of a slightly above average sized house for the UK. In some countries my house might be viewed as a mansion, in others (namely the US) a shoebox. There aren’t many in Europe I suspect with enough square footage to dedicate a room entirely to VR. In the US, outside of the big cities, I suspect that might be far more feasible.
Of course, SteamVR offers a compromise, you can qualify for room scale with just 2M x 1.5M. I tried this out by taping off a section of my floor and re-running SteamVR’s room setup using the tape as the bounds. The result? Indeed, it felt like a compromise, especially when reaching out with the SteamVR controllers.
Is giving up the space worth it? Hell yes! If you can somehow swing the idea of giving over a room in your house to the HTC Vive, you’re in for some incredible experiences, some that offer immersion that seated, gamepad-based VR can’t hope to match.
Headset Features and Ergonomics
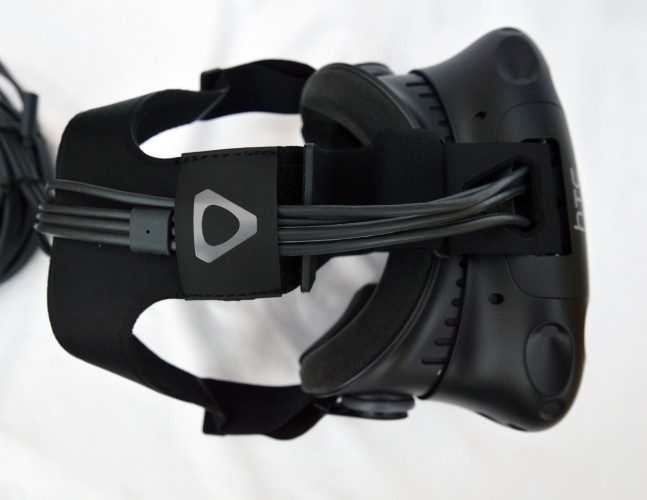
The Vive headset is, despite it not really being a looker, an extremely comfortable piece of face furniture. The cushioning supplied for the facial interface is sturdy and provides ample padding. The head-strap, now more akin to a head harness than a ski mask, feels secure and supportive yet easy to don and to adjust once wearing. Adjustments are made via two Velcro side straps with an additional adjustable top strap.
Eye Relief and IPD Adjustment
Us humans are a varied bunch, physically speaking, and the configuration of our faces is no exception. As VR strives to present virtual worlds to us as naturally as possible, visuals are presented in stereoscopic 3D, which is how we experience reality of course.
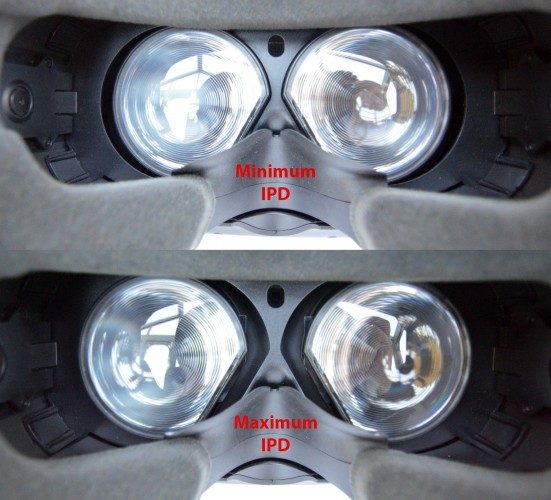
In order to show a comfortable 3D image however, images for both left and right eyes must be presented at a distance between each other that closely matches our IPD (Interpupillary Distance); that’s the space between our eyes.
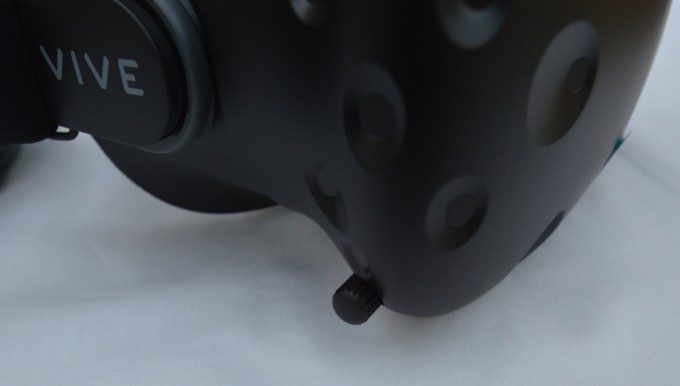
The HTC Vive includes an adjustment feature that physically shifts the lenses and displays behind them to match your IPD. A small but chunky dial on the right hand side of the headset can be turned to shift those lenses closer or further from each other. The action is nice and precise and you’re presented with a handy view of the measurement inside the headset telling you precisely what distance you’re setting in millimetres.
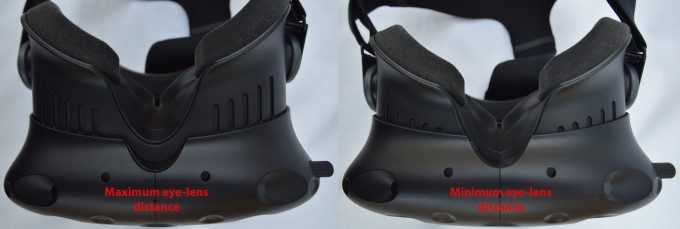
The eye relief function moves the lens and display further or nearer to your eye. If you’ve used the Oculus Rift DK2, you’ll know about a similar function which required a coin on either side of the headset to retract or extend the assembly. On the HTC Vive however, the designers have been cunning and ‘hidden’ the functionality away as part of two light grey dials you you can pull out and rotate to extend or retract either side of the headset’s assembly before pushing the rings back in to lock the mechanism. It means you can easily adjust eye relief once you’re inside the headset – rather than constantly having to remove it to adjust.
Thin Face or Wide Face?
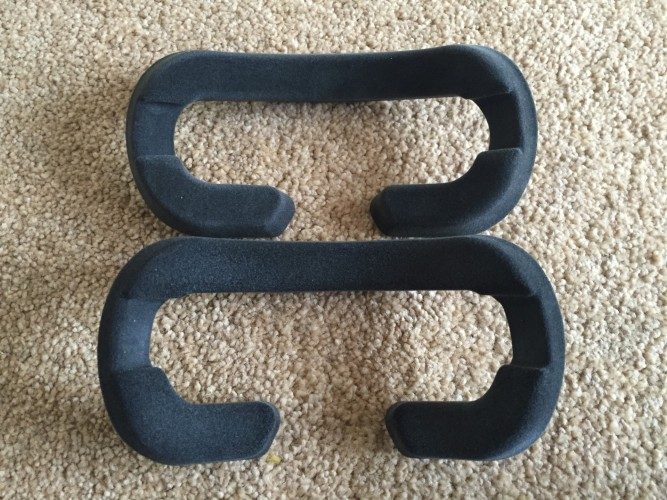
I bet that’s a question you’ve never asked yourself and yet it’s a physical variable HTC have catered for. The Vive features a removable face interfaces (the foam gasket) that is affixed to the inside of the headset with velcro.
Despite the interface padding staying firmly in place whilst in general use, it’s easily removed with a sharp tug. It’s the one part of the headset most likely to need the occasional wash over the long term (I haven’t actually checked if they’re machine washable yet).
Glasses
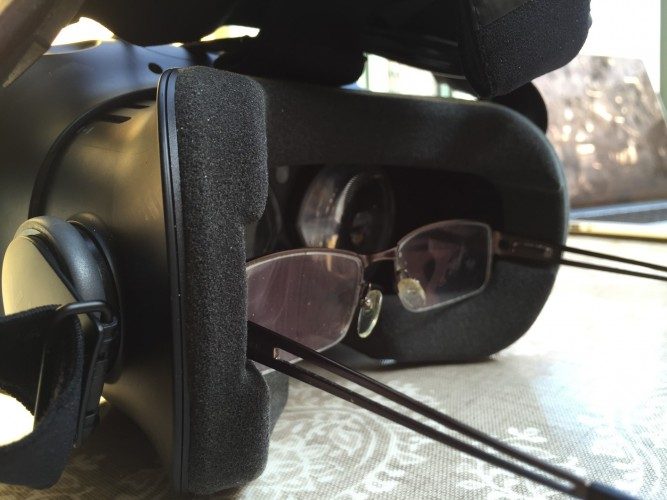
For the most part, the Vive’s headset is very accommodating for me as a glasses wearer. Granted, I’m not the sort to splash out on gargantuan hipster frames, mine are fairly low profile, but generally there was no issue popping the headset on.
But, as has been the case since the days of the DK1, taking the headset off again is a pain in the arse. It’s almost impossible to handle the removal of headphones and the headset while stopping your glasses being sucked from your face in the process. As I say, this isn’t exclusive to the Vive, it’s a fundamental flaw of the goggles / head strap style design. The only commercial headset I’ve tried which elegantly sidesteps this issue is the forthcoming PlayStation VR, which uses a rigid head mount and a neat sliding assembly for the visor.
When you’re inside the Vive in glasses, the eye relief mechanism is a real boon. With eye relief at minimum (that is, with your face and eyes closest to the lenses) I was actually able to comfortably use the headset with my glasses on with no undue discomfort such as the nose bridge pressing down painfully. I was able to keep eye relief at near minimum settings, and seemingly didn’t sacrifice much in the way of FOV (field of view) either.
Cabling and Connectivity
Similar to the Oculus Rift DK2, cables and interconnects are terminated on the headset at the top of the unit. A breakaway section reveals not only termination for power, USB and HDMI video but also an auxiliary USB3 port, perhaps for additional peripherals in the future. It’s all neatly tucked away, yet nicely accessible should you need to detangle things quickly.
Display Quality, Artifacts and Specs
Those who have been following the gestation periods for both VR headsets will know that, outside of tracking and motion control, the HTC Vive and Oculus Rift are stable mates when it comes to display and optics, at least on the surface. Both sport dual OLED displays with a resolution of 1080 x 1200 for each eye, for a combined resolution of 2160 x 1200. Both displays run at 90Hz and together deliver the image in stereoscopic 3D.
The Vive’s display, as the Oculus Rift, uses a PenTile matrix structure, the benefits and drawbacks of which are well documented by now, but I’ll leave disputes over effective resolution for squabbling forums as, for this review, I’m more concerned with how they perform in real life.
One of the first things that strikes you when you put the headset on is how bright and vibrant the Vive’s displays are. It’s actually quite uncomfortable to see a fade-to-white transition because of how bright the display is when it’s that close to your eyes.
OLED is famous for its contrast ratio (the output difference between the blackest blacks and brightest whites), and this helps colours in any scene pop, with those inky blacks providing depth through contrast. However, OLED panels have drawbacks, most notably the ‘dirty screen’ effect usually found when displaying uniformly off-black scenes. On the Vive development kit this was a rather noticeable issue, but at CES this year, HTC announced that it was integrating ‘Mura Correction’ into the display to help combat this effect. It seemed to work too because, although that dirty smear can still be seen in dark scenes (or in loading transitions) the displays do appear crisp and clean most of the time.
The display is extremely adept at coping with a range of visual scenarios, from the gleaming white, faux laboratory environments of the portal themed SteamVR tutorial, to the intense contrasts found in The Blu’s deep sea experience.
Screen door and pixel structure is visible but, unlike the Oculus Rift DK2, pixel density is great enough for the panels’ structure to melt into the experience seconds after donning the headset. As such, the PenTile sub pixel structure of the panel is barely evident.
Lens Quality and Artifacts
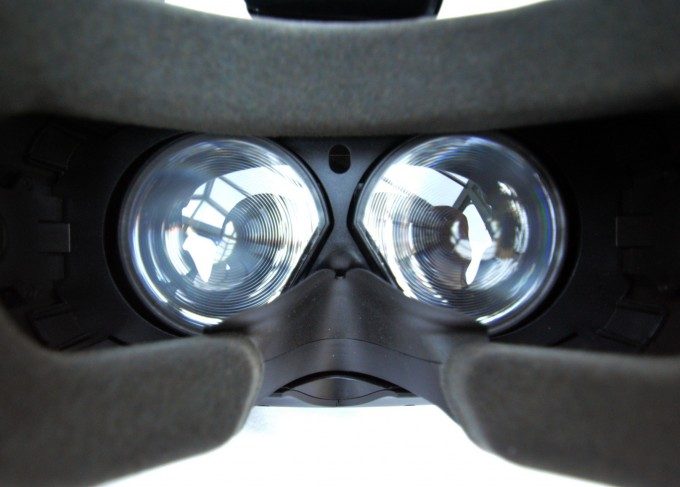
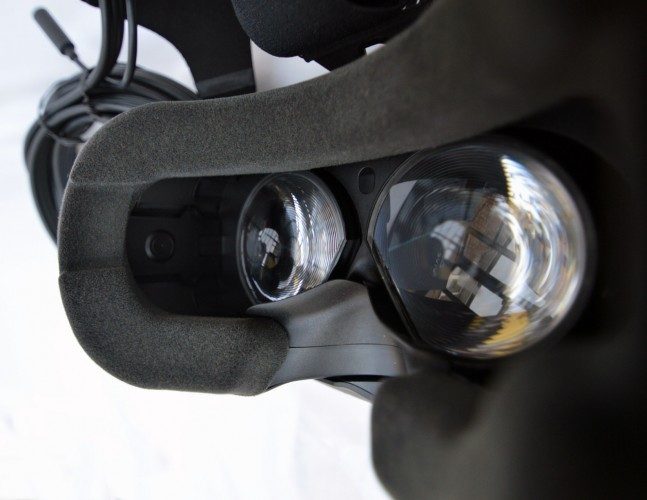
Another similarity between the consumer Oculus Rift and the HTC Vive are their choice of lenses. Both use Fresnel lenses which, unlike the Oculus Rift DK2’s Aspheric lenses, are more compact, being formed from concentric ridges. Fresnel lenses are lightweight as well as compact, but they bring with them artifacts that you may be unused to seeing if you’re coming straight from the DK1 or DK2.
Those ridges are visible, and if you choose to seek them out and focus on them, you will begin finding them distracting in many visual scenarios. Luckily, you simply won’t ever do this in practice, however you will notice them from time to time in certain situations.
The following section uses images from an amazing article by Oliver Kreylos (aka DocOK), who recently did some tests documenting the properties and capabilities of lenses used in both the Oculus Rift consumer edition and the HTC Vive.
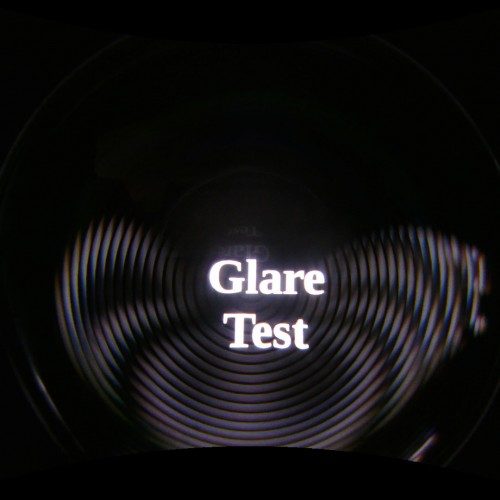
The glare artifact is however a much more distracting side effect of Fresnel lenses and their structure. It’s an effect (illustrated above) caused by ridges scattering light. It occurs often, generally in high contrast scenes which, thanks to the consumer Vive’s bright OLED panel, is a regular thing. There’s nothing you can do about this, aside from petitioning developers to dial back contrast scenes in their games, which is . After a while it’s something you begin to expect and although it’s not longer a surprise by that point, it’s less of a distraction. Once in the midst of an engrossing VR experience, it’s not something I found myself concentrating too often.
The SteamVR Controllers
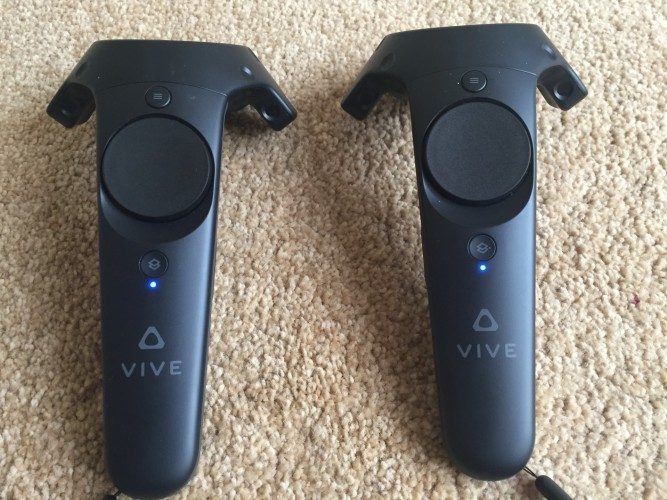
The Lighthouse tracking system is a versatile system which allows any peripheral integrated with photo sensitive diodes to be brought into the virtual plane, tracked with 6 degrees of freedom with pinpoint accuracy. The key to unlocking the HTC Vive’s full room-scale potential lies within the bundled SteamVR controllers, a pair of oversized that you dual wield for the majority of SteamVR content.
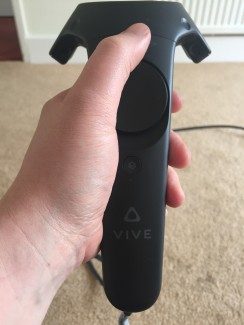
The controllers themselves are quite large, especially in comparison to Oculus’ forthcoming, and fairly compact Touch controllers. That said, the open design of the controllers mean 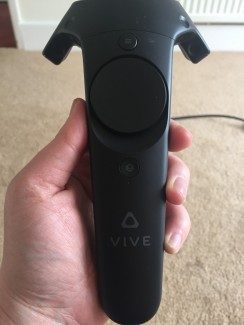 they’re easy to pick up, adjust your grip with and (if necessary) swap hand with. For most experiences you can use controllers in either hands, meaning lefties (and righties) are automatically catered for, a nice bonus.
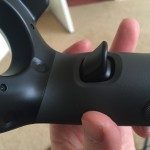
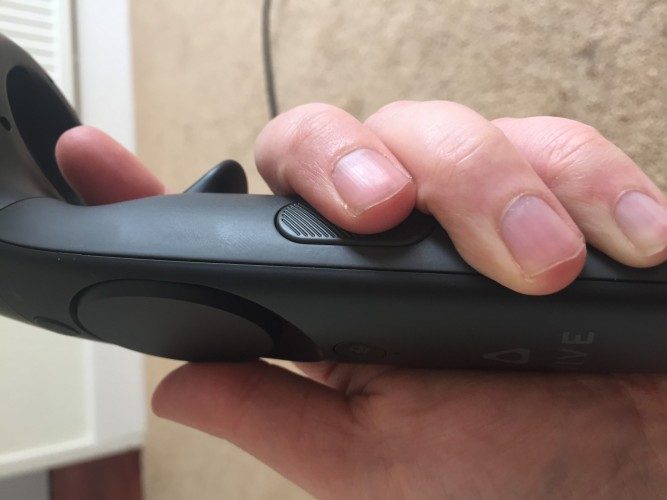
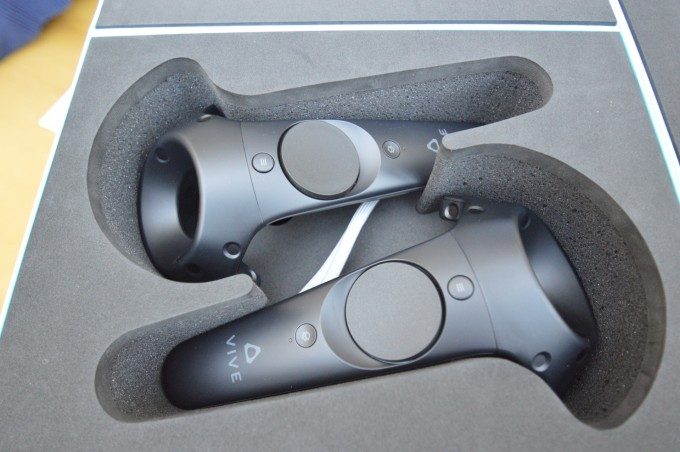
The controllers constitute the main body, comprising two digital ‘grip’ buttons on either side, one analogue trigger button, one ‘System’ button towards the base and a ‘menu’ button toward the top. Despite the comparatively large distance between the two face buttons, shifting balance in your hand in order to reach them whilst in-game is easy. Towards the middle of each controller is a large trackpad which acts as a precise analogue control system as well as a multi-point button, which can be split up on a per application basis (check the SteamVR tutorial for a good example of this.
Again, thanks to the accuracy of Lighthouse, you can don your VR headset and (assuming you’ve turned the controllers on using the system button first, find and pick up the controllers with ease. It’s one of the magical moments with Vive, when you connect with them as real objects mapped perfectly in VR.
The trigger buttons are used by most applications as a means to enact a grab mechanic in game, as well as the primary action button. The triggers are beautifully judged, with just the right amount of travel for precision analogue input, as well as a digital button once you’ve depressed the trigger fully. This is the action that people just ‘get’ once using the controllers.
The grip buttons are a nice idea, if sparsely used at present. Just one game I tried, Raw Data from Survios, used the buttons. In that game, you squeeze the grip buttons to hold your weapon and continue gripping until you let go, watching your weapon fall to the floor. I’m not sure if, over time, the necessity to apply constant pressure in a game would become tiring, it didn’t for my brief spell in Raw Data and it’s nice to have let another physical way to interact with the game.
The controllers are wireless, with charging points at the base of each. Battery life was excellent over the week I used them, I’d estimate up to 10+ hours could be achieved on a single full charge, possibly much more. In truth I need to live with them a little longer to gauge this more accurately.
The SteamVR controllers are a triumph of iterated design and, although I’d have preferred them to be a touch smaller, my son’s playtest found elsewhere in this review, prove the even those with very small hands have little trouble getting to grips with them.
Sound
Audio matters in VR, and it matters a lot. A sound mix in VR isn’t just about enhancing atmosphere, it’s often crucial in directing a player’s attention to things that may be behind them and the more time I spend in VR, the more I realise you cannot have a complete VR experience without a good audio mix.
The HTC Vive doesn’t include integrated audio and, to be frank, this is one of its biggest failings when compared with the recently launched consumer edition of the Oculus Rift, which comes with its own custom audio pipeline as well as custom, headset-fastened cans. Why is it such a big deal? There are a couple of reasons:
- integrated headphones are a boon for the physical user experience of VR. There’s no messing about with extra cables and you don’t have to do the ‘VR Headphone Dance’ where you try to figure out if putting on one before the other is best and inevitably getting tangled up anyway.
- Including a known audio constant which developers can target is important too. Every Oculus Rift will have identical tonality, frequency response, and imaging properties to its integrated audio, which means coming up with a compelling spatial audio mix that works for everyone is much easier.
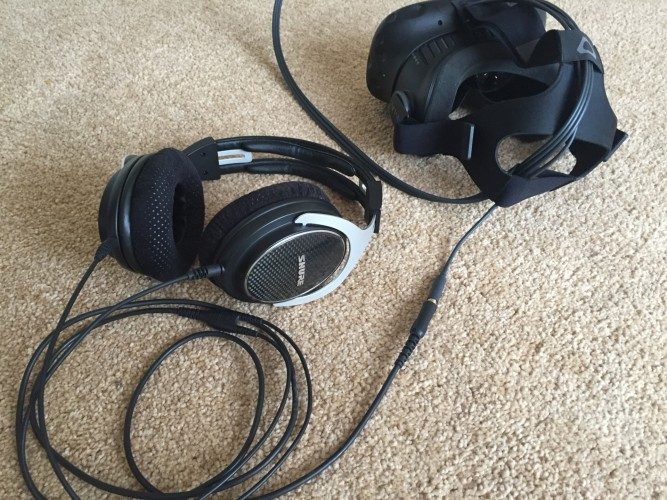
However, unlike the Oculus Rift DK2, you don’t have to trail a lengthy cable back to your PC, as there’s a 3.5mm jack fed straight off the Vive headset. One less wire to stumble over, thankfully.
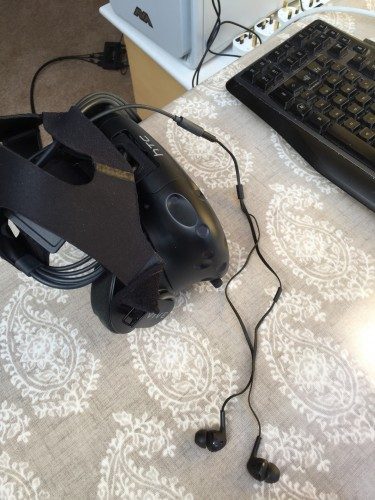
The HTC Vive does come complete with a set of in-ear monitors (ear bud) / earphones as part of the package, and they hold shortened chords to help avoid tangles. They actually sound pretty serviceable in action too, providing decent enough bass extension and good imaging; HTC certainly haven’t thrown the cheapest units straight into the box here. They’re pretty comfortable too, although I found the only way I could wear them and not have them tugged out of my ears was to feed them under my chin. They do however offer little to no isolation from ambient noise.
But, you can of course hook your own cans up to, when fed with some of the best audio mixes from SteamVR’s library, my Shure 1540’s sounded great (if under driven by the onboard headphone amp) when hooked in, and provided a mostly isolatory experience from ambient sounds.
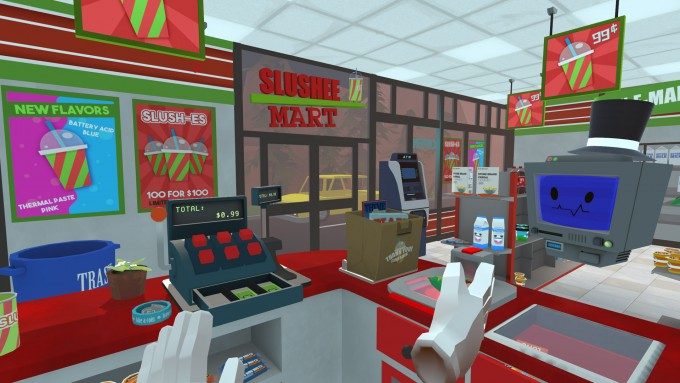
And once you’re in VR, some of the spatial audio mixes heard there are extremely effective. One of the simpler mixes, Job Simulator offers up a dynamically shifting soundstage that manages to create the illusion of precisely positioned sounds coming at you from all angles. Everything is anchored where it should be, and as a result your investment in this make believe world is made that much easier.
A Question of Content
There’s a reason why both the Oculus Rift and HTC Vive have felt more and more like traditional games console launches as their launch days have loomed. Both Oculus and Valve realise that, no matter how many whizz-bang technical demo’s they throw at their respective headsets, even the enthusiast/early adopter crowd who are hoovering up the first waves of headsets won’t be satisfied. Oculus have said right from their initial Kickstarter that VR without content guarantees failure and the last thing VR’s second chance needs is that.
Let me be clear, there are some fantastic launch titles available from launch. From the dazzling and adventurous collection of VR experiments in Valve’s The Lab, to the presence inducing and moving La Peri, the wildly fun and inventive Job Simulator, and of course the sublime Fantastic Contraption, there is great, progressive entertainment ready to burn through from day one for Vive owners. But, whereas Oculus’ lineup arguably boasts a bevy of what could be termed ‘full games’, the majority of content built for SteamVR and Vive right now can feel a little thin by comparison. There are a number of titles here that are effectively previews for full experiences, or short virtual reality films with limited replay value.
We doubt it will stay that way for long though. One reason that Oculus has a solid line-up of ‘full games’ at launch, could easily be attributed to the fact that they company and courted third-party developers have been learning to develop for the Rift for years before the Vive had even been announced. Not to mention that the Vive’s room-scale + motion input brand of gameplay brings entirely new VR design questions to the forefront.
Of course, quantity doesn’t equal quality, and the best that Vive and SteamVR currently offers can be truly breathtaking and in some instances temporarily mind altering. Returning to that console analogy for a moment: the Vive launch evokes some of my fondest memories of Nintendo when it was at the peak of its powers. Think of Valve as the Nintendo of VR here, delivering first party experiences that are tightly tied to the hardware they’re designed for.
As a company who’ve been toying with the mechanics, technical difficulties, and creative possibilities VR presents, their launch title, The Lab, is a confident and playful ‘best of’ compilation of experiments conducted within the bowels of Seattle’s most famous games developer.
Valve of course are not the only developers building worlds for the Vive. I had access to almost 40 games and experiences during my first week with the system, all of which I tried. However, Valve tells me that, just after this review is due to be published, the number of titles will be close to double that.
The ‘Ultimate’ Intuitiveness Test
As someone who’s been using and writing about VR for years now, I’m pretty familiar with VR’s drawbacks, tropes and mechanics, so it’s very difficult for me to gauge how successfully an experience might translate to those who have either yet to try any VR at all or have had minimal experience with it. So the question was: How do I prove or disprove how intuitive the HTC Vive experience is?
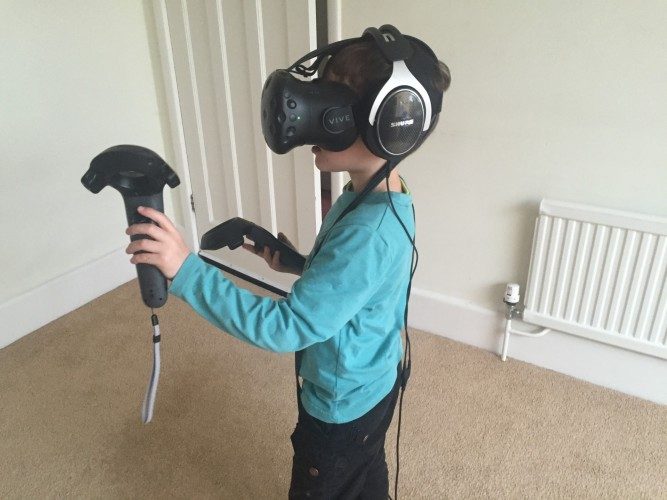
The answer was to ask my six year old son to try a VR experience, giving little to no guidance to him, and watch how he gets on. The results were a pretty impressive endorsement of Vive’s implementation of motion controls and more specifically Owlchemy Labs’ interpretation of virtual reality accessibility with their game, Job Simulator.
Disclaimer: Now, before everyone goes and calls child services on me, I’m more than aware of the current thinking that children under the age of 13 shouldn’t spend extensive time in VR headsets. Let me assure you my son spent no more than 10 minutes in VR with no ill effects felt. In fact, the biggest problem I had was getting him to out of the damn thing.
Watching my son explore the possibilities of VR as he took on the role of a shop assistant in Job Simulator was an affirmation (and perhaps a vindication) of VR’s potential. Developer Owlchemy Labs have distilled in Job Simulator the essence of accessibility and fun found in the best video games. Once ‘inside’, my son immediately started testing the rules of the game by trying to open things and within 30 seconds he’d worked out how to open a drawer, pull out hot dog buns, and he learned that he could eat them by holding them to his face (I hadn’t told him any of this).
He ‘got it’ straight away. Why? Because what he was doing was not so far removed from actions he’d make in real life, except in this world he was allowed to pull out a bottle of soda and shake it until it exploded. Between the accuracy of Lighthouse and Owlchemy’s attention to user experience, the barriers between Dan’s physical self and the virtual plane were largely removed.
One note: My son had walked through the SteamVR tutorial a day prior to playing Job Simulator, so he understood the layout and the language of the controllers. I’d suggest this is something everyone does for players as a first step into VR and the Vive, if only to be aware of the Chaperone system and controller’s buttons.
Interestingly, he didn’t have issues wielding the SteamVR controllers with his little hands, and, despite their size and heft, was able to wave and guide them accurately around.
The Seated VR Experience & Desktop Theater
So, there still remains a misconception in the wider media that the HTC Vive requires a large room to work, or that all experiences developed for it need the player to stand or walk. However, the Vive, ably assisted by Lighthouse, seems to be just as adept at dealing with head tracking as part of a seated experience.
Rather than dismantling my room-scale setup and transfer to a desktop configuration however, I decided to simply sit in the middle of my room-scale playspace and see how Lighthouse managed.
Firing up SteamVR, I chose to dive into Descent: Underground. Once in the game proper, I experimented with slight head movements, gradually exaggerating my head motion to try and detect and jitter, stutter or any other anomalies. I couldn’t. It worked flawlessly throughout my game, so much so I ended up forgetting about the test and instead enjoyed my time in the game.
In theory, a single base station is enough for a seated VR experience and although I didn’t specifically test that scenario here, I have witnessed set ups that use a similar configuration which seems to work just fine.
If you fire up a non-VR game whilst inside the SteamVR interface, the system will prompt you whether you want to open it inside Desktop Theater, a virtual viewing area specifically for playing traditional 2D games inside virtual reality. Yes, it sounds very much like a gimmick, but in actual fact, Valve have done a great job at implementing a believable space, complete with reflections from the game in play. The draw here of course is 1) you don’t have to leave VR in the middle of a session to play an older game and 2), you get to play your games on a screen bigger than you’ve ever dreamed.
The downsides are that framerate for the projected game isn’t as high as it would be played natively, so the feature right now is probably limited to use with slower-paced games which aren’t dependent on low latency response times.
Exercise as an Added Bonus (or Penalty)
Now, given that both my professions are largely sedentary in nature (i.e. I sit on my arse most of the time) and I’m out of shape thanks to using all my spare time to write about VR (you’re welcome!), there is one aspect of spending large amounts of time in standing / walking / arm waving VR experiences I didn’t fully appreciate; fatigue.
Depending on the experience, you may be asked to repeatedly make the motion to fire with a bow and arrow for example, or guide a paintbrush through space or even just pick up and put down a bunch of stuff. The drawback here is that you become tired after fairly short periods of play. As a direct comparison to gaming, I’d say that sessions with full room-scale and active VR experiences have an optimal length of between 20-30 minutes, dependent on the experience. Otherwise, neck strain, arm strain, back strain and general physical fatigue starts to rear its head.
I accept that mileage (almost literally) may vary from person to person, I just celebrated my 40th birthday for example, but everyone will have their limit, and in comparison to a seated traditional gaming experience, maximum play sessions will likely be drastically shorter as a result. For example, I’m perfectly able to spend hours at a time blasting my way through New York in The Division (for better or worse) and sometimes, that’s exactly what I want from a gaming session. Obviously the two experiences are not directly comparable in terms of pure experience, but it’s a choice gamers who invest in VR will have to make about their time.
As for the benefits, they are very welcome indeed. After spending the evening in room-scale ‘active’ VR, I felt weary but exercised, like I’d just come back from a gentle walk (albeit without the fresh air benefits). It’s nice to be able to indulge in a pastime you love without the same levels of guilt sedentary gaming evokes. And although I wasn’t burning through huge numbers of calories, I suspect the long term benefits to switching out traditional seated gaming with equivalent stints in active VR experiences may well be beneficial to many.
 This review was produced by testing the Rift on the Road to VR Exemplar Ultimate, our top-end system designed to push virtual reality experiences above and beyond what’s possible with systems built to lesser recommended VR specifications. The Exemplar Ultimate is the reference point for gamers who demand the best virtual reality experience.
In celebration of the launch of the Oculus Rift and HTC Vive, you can save $150 off the Exemplar Ultimate using code ‘VRLAUNCH2016‘ through April 8th.
Disclosure: Valve provided Road to VR with an HTC Vive system to facilitate this review.

