
Want to substantially improve image quality whilst immersed in your HTC Vive? Here’s details of a new tweak that allows you to engage supersampling in SteamVR and compatible games with the resulting differences impressive – as long as your system can handle it.
Update (2/7/17): This free utility makes supersampling on the Vive much easier.
Recently we published a report explaining how to use the Oculus SDK debug tool to increase rendering ‘pixel density’ in many games running through Oculus Home and just how much the process improved the resulting image quality once inside VR.

Now, the enterprising crew over at the Eagle.ru forums have discovered a config entry for SteamVR that similarly allows players (assuming they have the GPU grunt) to tweak pixel density to add Supersampling to the image pushed to the Vive on a sliding scale. That is, rendering the image at a higher resolution than the Vive’s native 2160 x 1200 before finally downsampling and displayed in the VR headset.
Unlike the tweak for the Oculus Rift, there’s no need to engage an extra tool to get this running either and performing the changes will engage it for all SteamVR launched titles globally. Here’s how.
- Open your Steam’s install folder. This will vary depending on where you put Steam when first installing – for me it’s ‘C:\Program Files (x86)\Steam’.
- Open the ‘Config’ directory and open the ‘steamvr.vrsettings’ file (make a backup first ideally) using Notepad or your chosen text editor (click for larger version of image below which indicates file location).
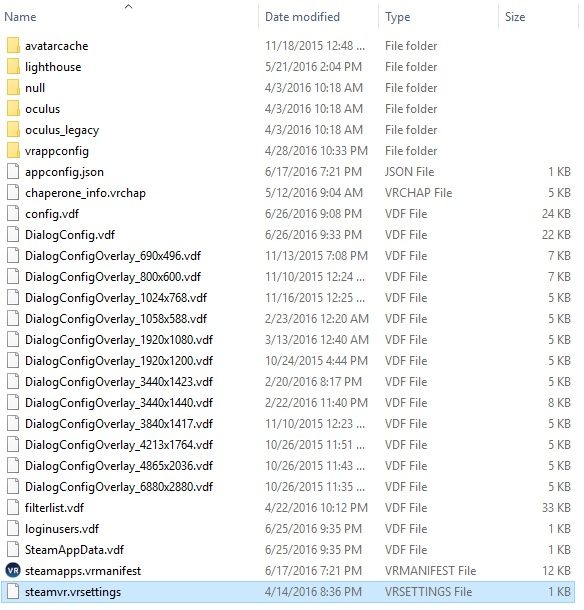
- You’ll be confronted by a scary looking JSON config file, but don’t worry, you’re interested only in the section towards the bottom labelled “steamvr”.
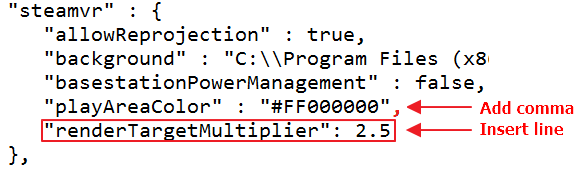
- You then need to add the following line to the end of that section:
"renderTargetMultiplier": 2.5
- Add a comma (,) to the end of the line immediately before the new line you just added.
- Once you’re done, your config file should look something like this (note, your pre-existing lines may not be identical to what’s seen here):
- Save the file and fire up your favourite VR experience.
Please note that depending on your GPU’s reserve power, you may need to reduce the multiplier from ‘2.5’ to something lower and fair warning, you will need some grunt to keep your VR game’s frame rate above the hallowed 90FPS and avoid judder and general discomfort. Try reducing by .1 increments to find a sweet spot (or indeed increasing should you have the power – although diminishing qualitative returns will be felt above this).
That’s it! Let us know your experiences in the comments section below and your system configurations. It’d be interesting to see what kinds of success people achieve with their hardware.


