Specs & Performance
Tech Specs
| Product Name | PlayStation VR |
| Product Code | CUH-ZVR1 series |
| Release Date | October 13, 2016 |
| External Dimensions |
|
| Mass |
|
| Display Method | OLED |
| Panel Size | 5.7 inches |
| Panel Resolution | 1920×RGB×1080 (960×RGB×1080 per eye) |
| Refresh Rate | 120Hz, 90Hz |
| Field of View | Approximately 100 degrees |
| Sensors | Six-axis motion sensing system (three-axis gyroscope, three-axis accelerometer) |
| Connection Interface |
|
| Processor Unit Function | 3D audio processing, Social Screen (mirroring mode, separate mode), Cinematic mode |
| Included |
|
Display & Lenses
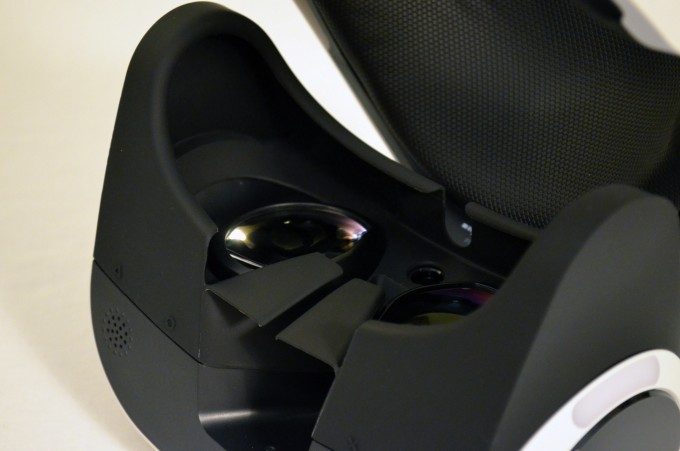
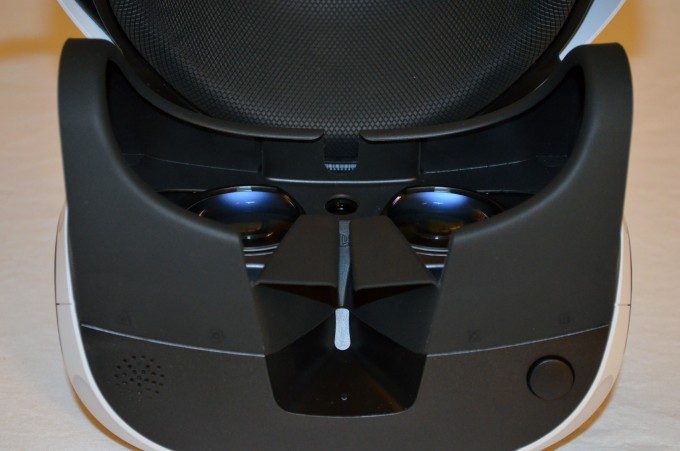
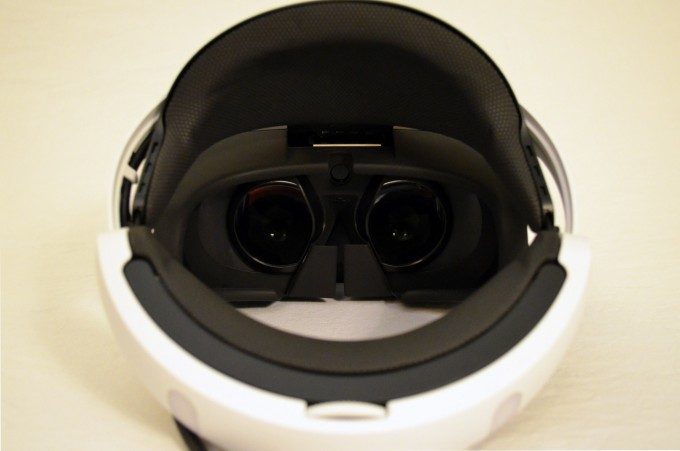
Of the three ‘big three’ VR headsets, Sony’s PlayStation VR is the only one that has opted not to use a Fresnel lens which eliminates one of our biggest gripes about the lens system on the Rift and Vive which is the light ray (aka god ray) artifact. Despite this, PSVR still manages an impressively wide field of view, and one that I suspect will be reported as the largest among the three headsets because of its ease of adjustment.
Field of View
Field of view is tough to measure because there isn’t currently an agreed upon method of measurement, especially because facial structure can play a big role in how wide a field of view can be seen by each individual.
With that said, Sony quotes the PSVR field of view at 100 degrees, same as the Rift. And while it’s tough to track down an official field of view figure for the Vive, it has been shown to be wider than the Rift.
Despite that, I think that many reports will state that PlayStation VR has the widest field of view, not because it has the largest on-paper field of view spec, but because of how easy it is to adjust the lenses very close to your eyes.
Because PSVR uses that ‘hanging’ style display assembly mount, which doesn’t rely on the display assembly pressing against your face to hold it on your head, the display assembly is free to move back and forth as needed, and Sony has built in a handy button under the bottom right of the assembly which allows you to slide the entire thing back and forth a significant amount.
The maximum extended position is handy to be able to peek at your smartphone or to get your orientation on the controller you’re holding. Conversely, the minimum extended position lets you bring the lenses very close to your eyes, giving an impressively full field of view that, to me, feels as large, if not larger, than that of the Vive.
IPD Measurement Tool
While PlayStation VR doesn’t have a physical IPD adjustment (to change the distance between the lenses to match a user’s eye spacing), it does have a software IPD adjustment which can help improve clarity and comfort in VR.
You can manually dial in your IPD if you already know it, or you can use the PlayStation Move camera to do an approximate measurement. You’ll find the option under Settings > Devices > PlayStation VR.
The tool works by snapping a stereo image of your eyes as you stand near to the PlayStation VR camera. After taking the photo, the software will attempt to automatically detect the center of your pupils, and you’ll be given the opportunity to fine tune that detection by moving a cursor on each photo of your eye to the exact center. The result will spit out an IPD measurement in millimeters and automatically plug that value into the IPD setting.
In my experience the IPD measurement seemed inaccurate by one or two milimeters, but the UI during the process does warn that it’s an approximate measurement only.
Don’t Listen to People Who Say PSVR Has a Bad Screen Door Effect and Low Resolution
I’m fairly certain PSVR is going to generate reports of “bad screen door and low resolution,” but these reports are going to come from people misattributing what they’re seeing to the wrong causes.
Screen Door Effect
The screen door effect (SDE)—the black unilluminated spaces between pixels—is impressively unobtrusive on PlayStation VR.
While some tend to think that PSVR’s lower 1920×1080 resolution (compared to 2160×1200 on the Rift and Vive) must mean there’s a greater SDE, that doesn’t seem to be the case, or is at least if it is, it’s extremely difficult to detect. You can make out individual pixels if you have good eyesight and focus very carefully, but it’s almost impossible to see the (RGB) subpixel structure.
Poor Mura Correction
If you hear someone saying that PSVR has bad screen door effect, they’re probably talking about bad mura correction.
Mura is an artifact that could easily be misconstrued as the ‘screen door effect’ if you asked someone to infer what ‘screen door effect’ looks like by it’s name alone. In reality, SDE and mura are two different things with different causes.
A hypothetical ideal display is capable of emitting the exact same amount of light from every pixel on the screen. This means that when you set the pixels of the display to a specific color value, they all look exactly the same.
In the real world however, most display have small discrepancies in the amount of light output by each pixel at the same brightness setting, causing a slightly different (brighter or darker) shade from one pixel to the next, even if the software driving the headset has asked for all pixels to be the exact same color and shade.

The larger the range in brightness between pixels that are supposed to be the same color and shade, the more mura artifact you will see. The result tends to look like a thin layer of linen over the image, and in most cases it’s exacerbated in darker scenes, especially when the pixels are set to their darkest lit value, where the user will see a field of grey speckled with lighter not-so-grey pixels.
Because the mura artifact is a result of an imperfect manufacturing process, the mura pattern is essentially random, making it an especially bad artifact for a stereo view, because when you see it the mura pattern won’t line up in each eye, creating an uncomfortable stereo conflict.
The mura effect looks to my eye to be more noticeable than we see on the Vive and Rift. The good news is that you probably won’t notice it in well lit scenes. You’ll probably see it (and get that uncomfortable stereo conflict) in games and experiences that like to fade to grey between scenes and loading, but this is something that can be effectively designed around once developers catch on, except for experiences that want to put you in dimly lit virtual scenes.
Aliasing
If you hear someone saying that PSVR has bad resolution, they’re probably talking about aliasing.
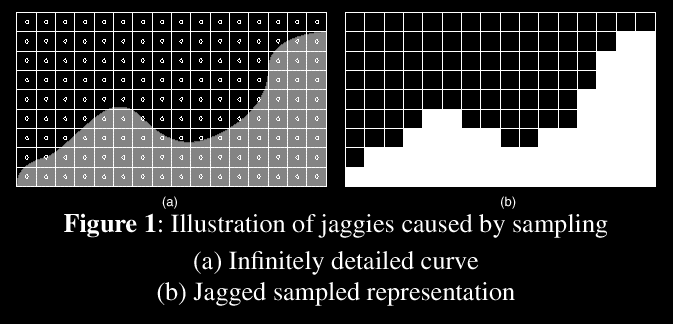
Aliasing commonly takes the form of jagged virtual edges that result when you try to represent a vector line of unlimited detail using a finite number of pixels.

Anti-aliasing is the art of treating those edges to make them appear more smooth. In the exact same number of pixels, not doing any anti-aliasing will make an image look terrible compared to something that’s properly anti-aliased (see right).
Good anti-aliasing takes technical know-how and requires a good bit of processing power. A poorly optimized VR experience probably isn’t abiding by best anti-aliasing practices from the get go, and isn’t going to have much overhead for anti-aliasing when all is said and done.
On PSVR I’ve seen some very poorly optimized and poorly anti-aliased experiences which really do not flatter the PSVR’s capabilities. On the other hand, I’ve seen some absolutely impressively crafted experiences, like Batman: Arkham VR, which stands as an excellent benchmark for how good console-powered VR can look through the PlayStation VR headset as powered by the standard PlayStation 4.
The truth is that a 1920×1080 display is sufficient for an impressive VR experience and the resolution will not greatly distract you unless the experience throws anti-aliasing out the window.
Muted Colors & No Black Smear
To my eyes, the PSVR display has slightly muted colors, especially in darker scenes. This is one of those problems that can be quite effectively designed around once developers catch on by using brighter, more vibrant and contrasting colors.
Thankfully, I haven’t spotted any black smear from PlayStation VR, which was a problem that plagued the Rift DK2’s OLED display, causing black parts of the scene to ‘smear’ into lighter parts as the users moved their head (due to a slow response time from the pixels that were turned off completely to achieve true blacks).
The muted colors and lack of black smear may be interrelated, as Sony may have opted to prevent the display’s pixels from going to true black (thereby reducing contrast, but eliminating black smear).
Sweet Spot
PlayStation VR’s lenses seems to have a spacious sweet spot (the range of the area where things look sharp through the lenses), but it seems to be somewhat limited in the vertical direction (up and down on your face). When donning the headset you’ll want to tighten everything most of the way and then make a last second adjustment for clarity by moving the headset up and down a bit before making the final crank.
If you access the PlayStation VR settings menu in PS4 you can have it display a screen with text to help you judge the clarity and your position in the sweet spot before heading off to your VR experience.

