Oculus App Lab, Facebook’s unmoderated app outlet, has largely stolen the thunder from the unofficial Quest app store SideQuest over the past few months. This is largely due to the ease of use that App Lab offers over SideQuest, the latter of which required you to install a PC-based program to install apps. Now SideQuest has launched a mobile app which lets you SideLoad apps on Quest without needing a PC. And you can do it wirelessly too.
SideQuest has taken a big leap forward today in its bid for continued relevancy as an unmoderated marketplace for Quest platform games and experiences. You’ll need the free SideQuest mobile app (Android only), an Android phone that supports OTG, any generation of Quest, and USB cable to link the phone and headset together.
There’s a great video guide, courtesy of YouTubers ‘Cas & Chary VR’, which we linked below to take you through each step. We’ve also included a text version below the video.
1: Enable Oculus Developer Mode
Just head over to Oculus Developer Organization dashboard, login to your Oculus account, and create what Oculus considers an “organization.” Toss a random name in there (if you truly aren’t a developer) and agree to the terms of service.
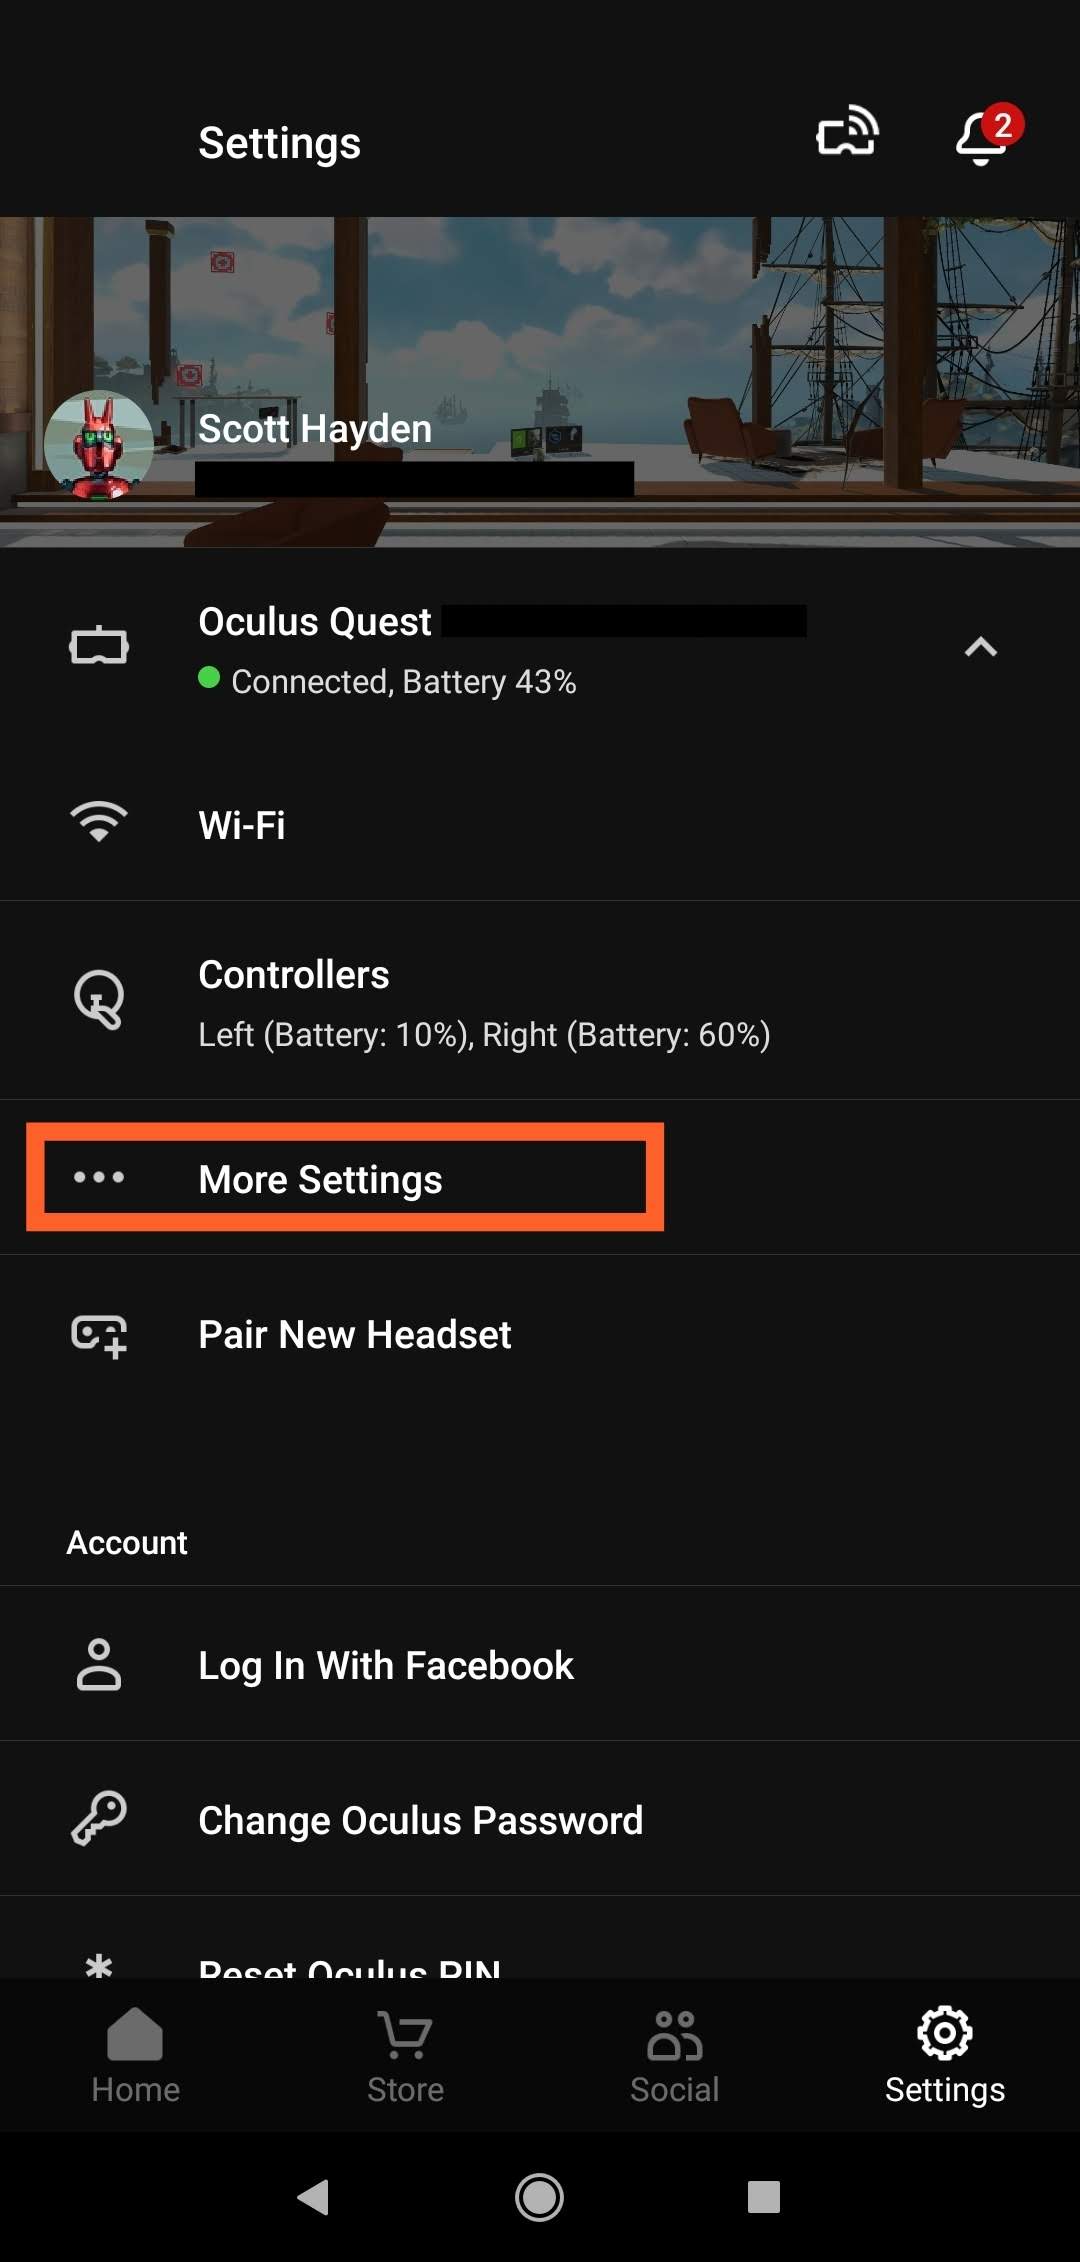
Now open the Oculus app on your phone, go to the ‘Settings’ tab on the bottom right hand side, tap to expand the options under your Quest and select ‘More Settings’.
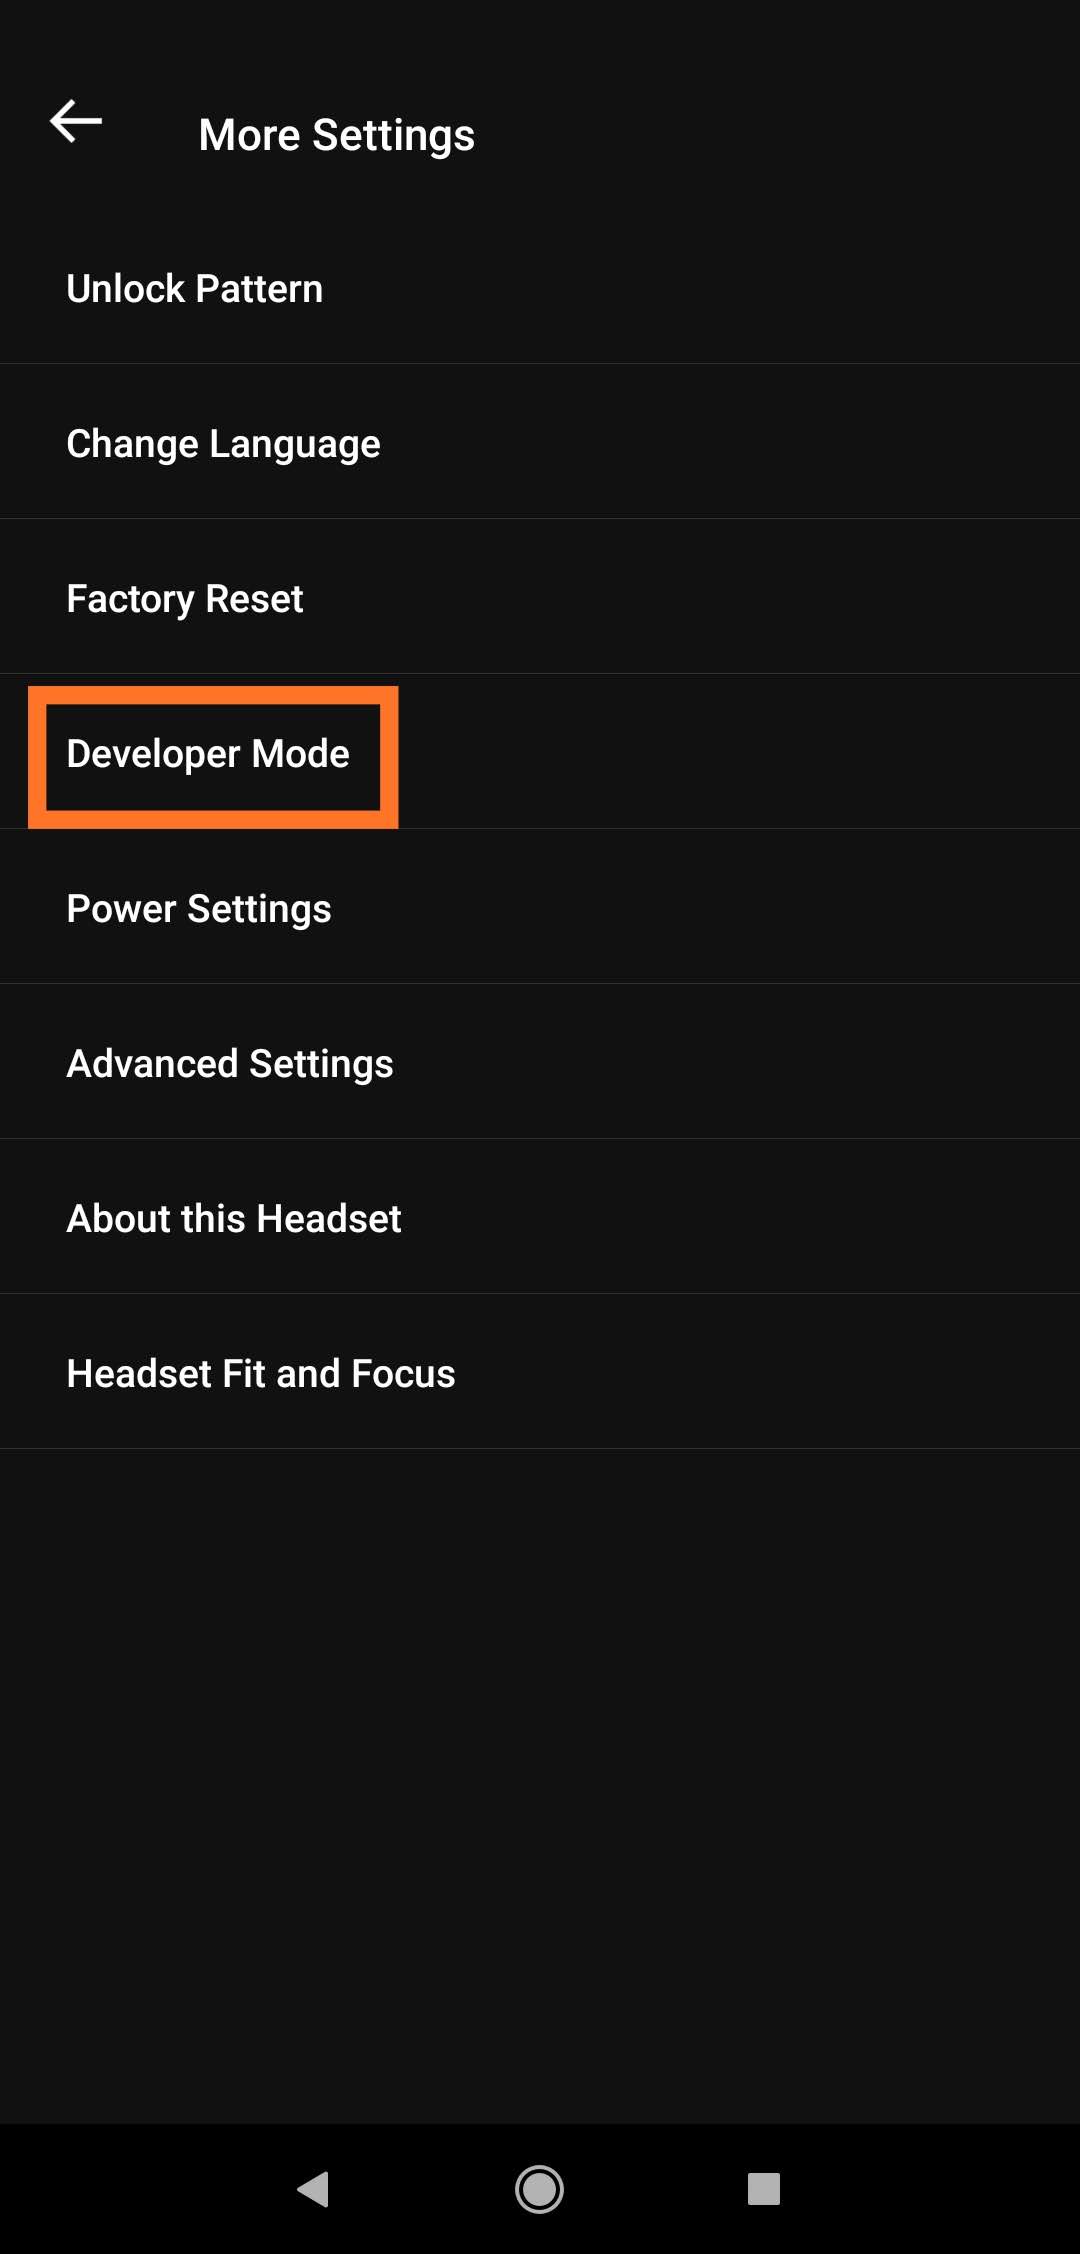
Among the various toggles you’ll find ‘Developer Mode’, which you simply have to toggle on. Reboot your Quest now for good measure.
2: Get the SideQuest App & Connect Up
Simply download the SideQuest Android app on Google Play Store. There’s no telling whether we’ll ever get one for iOS, and considering how locked down Apple generally keeps things, we’re not holding our breaths.
Now plug in your Quest to your Android phone. This is less tricky with modern phones with USB-C ports. Quest includes a short USB-C to USB-C cable in the box which will do the trick.
3: Allow USB Debugging & Sideload Wirelessly
Put on your Quest headset, and you should see a window (in VR) that says ‘Allow USB debugging?’. Simply click the check box ‘Always allow from this computer’. Also, ‘Allow Access to data’ now.
From here, you’ll see a green icon in the SideLoad app which means you’re ready to sideload anything and everything. You can do this wirelessly too by enabling Wi-Fi in the SideQuest app itself and popping in your local IP address. You can your local IP address by clicking the Wi-Fi icon whilst in-headset, selecting the network you’re currently connected to, and scrolling all the way down to reveal the string of numbers, oftentimes beginning with ‘192’.
4: Sideload Everything
App Lab is easy, but it’s not great for keeping an eye on new and interesting content since App Lab games can’t be seen on the Oculus Store. SideQuest however has direct links to App Lab when available and .apk files for content hosted natively. There are tons of games, demos, betas, experiences, apps, tools, and more on SideQuest. Now go forth and sideload!


